In the realm of computer operating systems, particularly Windows, users often encounter various errors that can hinder performance and usability. One such error is the “Service Registration is Missing or Corrupt.”
This comprehensive article aims to elucidate the meaning of this error, explore its causes, and provide effective methods for resolving it. Understanding this error is crucial for Windows users seeking to maintain the optimal performance and health of their systems.
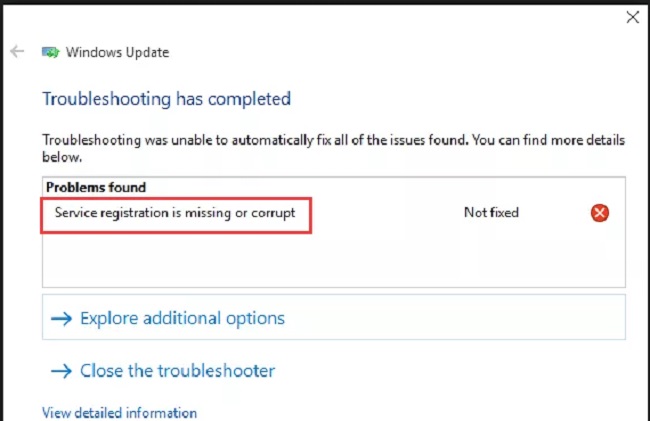
What is the “Service Registration is Missing or Corrupt” Error?
The “Service Registration is Missing or Corrupt” error is typically encountered in Microsoft Windows operating systems. It usually appears when there are issues with Windows services – critical components required for the operating system’s proper functioning.
This error often surfaces during Windows Updates, indicating a problem with the update process.
Read Also:
- Pokemon Go Unable to Authenticate
- The Default Gateway is Not Available
- VAC Was Unable to Verify the Game Session
Causes of the Error
Several factors can lead to this error, making it a somewhat common issue for Windows users:
- Corrupted System Files: The error can occur if essential system files become corrupted due to software conflicts, malware, or improper system shutdowns.
- Windows Update Issues: Problems within the Windows Update service itself can trigger this error, especially if the service stops working correctly.
- Registry Errors: Incorrect or corrupted registry entries related to Windows services can also lead to this error message.
- Malware or Virus Infections: Malware or viruses can corrupt system files or services, causing various errors, including the “Service Registration is Missing or Corrupt.”
Methods to Fix the Error
There are multiple approaches to resolving the “Service Registration is Missing or Corrupt” error. These methods range from simple troubleshooting steps to more advanced system repairs.
Method 1: Validating the availability of Windows Update services
We can see if Windows Update is properly installed and operating. Another possible root cause of this problem is that the update services are failing to carry them out.
- To access the Run command, use the Windows key plus R. To open the Services Management Console, type services.msc into the box and hit Enter. The service’s utility, which details all installed and active services, will launch.
- Search for “Windows Update” in the list that appears once the new window has been opened. Choose the service’s properties by right-clicking on it.
- To access the General settings, tab over there. Now that you’ve arrived at the Startup type field, you can use the drop-down menu to select from the several possible options. You can save your changes by selecting Automatic and clicking Apply.
- The same window’s Start button may be found beneath the heading Service status. To save your modifications and close the Properties box, use the Apply button.
- After you’re done tweaking Windows Update service’s settings, you should do the same for:
Background Intelligent Transfer Service
Cryptographic Service
These tasks are located in the same list as Windows update, making them easy to locate.
- Now that you’ve made the necessary adjustments, you should restart your computer and check that your internet connection is still working. Whether or not the problem warning has vanished depends on whether or not you reopened Windows Update after making any changes.
Method 2: Implementing Commands in the CMD Prompt
If the previous approach didn’t work, we may attempt fixing the error by entering some commands into the command prompt and seeing if it works. Before resorting to modifying the registry or reinstalling Windows, we will first try to resolve the issue by resetting the relevant configurations and settings.
- For the command prompt, press the Windows key plus the letter X. Also, you can use Windows + S and enter “command prompt” to open a command prompt. Click the top result, and then pick “Run as administrator” from the context menu that appears.
- After you’re at the prompt, type each of the following commands. Always hit Enter to carry out a command.
net stop wuauserv
net stop cryptSvc
net stop bits
net stop msiserver
ren C:\Windows\SoftwareDistribution SoftwareDistribution.old
ren C:\Windows\System32\catroot2 catroot2.old
net start wuauserv
net start cryptSvc
net start bits
net start msiserver
- Be patient as the various tasks run through to completion. Get Windows Update up and running and see if everything is working properly.
Method 3: Updating Your.NET Framework Files
Everyone knows that.NET files are fundamental to the functioning of a computer. Let’s see whether manually updating these.NET files solves your issue.
- To access the Run command, use the Windows key plus R. In the dialogue box, enter “control panel,” and hit Enter.
- Once you’ve entered the Settings menu, scroll to the left side of the window and click the Programs link there.
- When you get to the menu, select “Turn Windows features on or off” from the heading for Programs and Features.
- A summary of all the software and hardware on your machine has just been compiled. Please be patient while this is populating, since it could take some time.
- After finished, deselect everything that has the word “.NET” in it. It may take some time for.NET to be completely removed. A change can be saved by clicking the Okay button.
- Now that you’ve reopened the window, you may go back through and recheck anything that was previously unchecked. At this point, your computer will try to set up the framework. Be patient, as this could take some time.
- After the update has been installed, you will need to restart your computer for the changes to take effect before you can see if the issue has been resolved.
Method 4: Disabling Antivirus Software
Antivirus software having issues with OSes is nothing new. Antivirus software requires periodic updates because it uses definitions of viruses that are constantly evolving.
The Windows Update process may be generating problems because your antivirus provider hasn’t updated its definitions. We can test Windows Update’s functionality by temporarily disabling or permanently removing your antivirus software.
- To access the Run command, use the Windows key plus R. In the box that appears, type “control panel,” then hit the Enter key.
- The Uninstall a Software option may be found in the left-hand column of the Control Panel.
- Your computer’s current software suite will now be shown by Windows. You’ll need to look through them until you locate your antivirus software.
- To remove it, right-click on it and choose the corresponding menu item. Once you’ve finished uninstalling, reboot the computer to see if the issue has been resolved.
Read Also:
Conclusion
The “Service Registration is Missing or Corrupt” error in Windows systems can be a source of frustration, but it is usually resolvable with some basic troubleshooting steps. By understanding its causes and systematically applying these solutions, most users can effectively resolve the issue and restore their system’s functionality.
Regular system maintenance, updates, and security measures are key to preventing this and other similar errors. In cases where the problem persists, it may be advisable to consult with a professional or consider reinstalling the Windows operating system.


