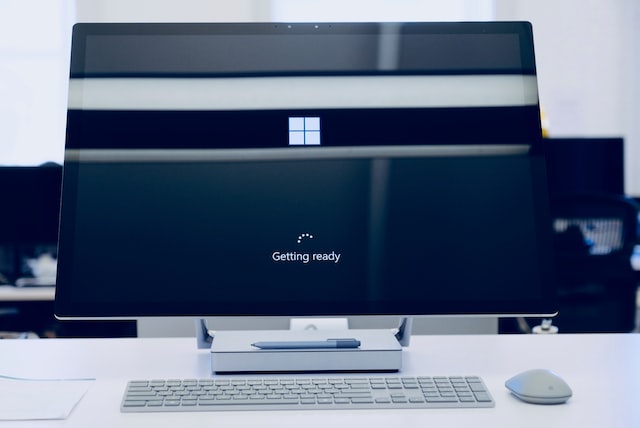
For users of Windows operating systems, encountering the message “Getting Windows Ready, Don’t Turn Off Your Computer” can be a common experience, especially after installing updates. While it’s generally a normal part of the Windows update process, sometimes it can linger longer than expected,
causing concerns. This in-depth article aims to elucidate the meaning behind this message, explore its common causes, and provide easy methods to resolve issues associated with it.

What Does “Getting Windows Ready, Don’t Turn Off Your Computer” Mean?
When you see the “Getting Windows Ready, Don’t Turn Off Your Computer” message, it indicates that your Windows operating system is installing updates, and it’s in the process of applying them to your computer. This message typically appears after you’ve installed updates manually, or when Windows automatically downloads and installs them.
Read Also:
- How To Enter BIOS Windows 11?
- How Long Does Windows 11 Take to Install
- How To Exit Full Screen on Windows?
The Role of This Message
This message is essentially a notification that Windows is in the process of finishing up the installation of updates and ensuring that everything is set up correctly. It is a critical step in the update process, as it involves the configuration and optimization of new files and settings.
Common Causes of Extended “Getting Windows Ready” Messages
In some cases, the “Getting Windows Ready” screen can persist for a long time, which might indicate issues with the update process. Some common causes include:
1. Large Updates
Some updates are larger and more comprehensive, thus taking more time to install and configure.
2. Slow or Overloaded System
Older systems or those with limited resources (like CPU, RAM, or disk space) can take longer to process updates.
3. Corrupted Update Files
Occasionally, the update files themselves can be corrupted during the download process, leading to delays or stalls in installation.
4. Software Conflicts
Some installed software, especially third-party antivirus programs, can interfere with the update process.
In Windows 10/11, Here’s How to Fix: “Getting Windows Ready Don’t Turn Off Your Computer.”
Solution 1: Be Patient for a Very Long Time.
Don’t give up hope if the ‘Getting Windows Ready Don’t Turn Off Your Computer’ screen persists for an extended period of time. I know from personal experience that some older computers can take anywhere from one to four hours (yep, you read that correctly) to exit the “Getting Windows Ready” page.
It took over 8 hours for some users’ computers to finally boot into Windows after being stuck on the “Getting Windows Ready Don’t Turn Off Your Computer” page. You should therefore plan on leaving your computer alone for a longer period of time, particularly if there are several updates to install. I would recommend switching to an SSD in this situation as well.
Solution 2: A Second Option is a Complete Power Loss.
If you’ve waited too long or are in a rush to get back to work, and the message on the screen hasn’t gone away, you can force the computer to shut down by pressing the power button. And here’s how:
Step 1. First, to shut down your computer entirely, press and hold the power button for at least 10 seconds.
Step 2. Second, remove any and all USB devices (including USB drives, USB printers, and so on) from your computer (except of course the mouse and keyboard).
Step 3. Third, remove the laptop’s battery (if it is removable) and power supply from the machine.
Step 4. After waiting five minutes, plug in the power cord. If you own a laptop, please reconnect the battery before continuing.
Step 5. Fifth, boot up your machine and see if the “Getting Windows Ready” screen stays on or if it boots normally.
Solution 3: Fixing a Faulty
If the above steps did not fix the problem, you can try using the Windows Recovery Environment (WinRE).
Step 1. First, boot into the Windows Recovery Environment by using the appropriate key combination (WinRE).
- The first step in turning your computer off is to press and hold the power button for at least 10 seconds.
- Power on your computer and wait for the manufacturer’s logo to show (or the spinning dots to appear) before releasing the power button; this will switch your computer off.
- Then, after you’ve done steps 2 and 3, you can leave your computer to boot.
- Select Advanced Options on the “Automatic Repair” screen, then proceed.
Step 2. activate Startup Repair.
- First, access the Troubleshoot > Advanced settings menu in the Windows Recovery Environment.
- Second, choose the OS you want to repair and then click the Startup Repair button (e.g. Windows 10)
- Third, restart Windows and let it fix the startup components.
- Restart into Windows normally and then re-install the patches.
Solution 4: Roll Back any Recent Updates that you may have installed.
If you’ve encountered this issue, you should uninstall the most recent update from the Windows Operating System Recovery Environment (WinRE).
Step 1. Follow the first step of Method 3 above to boot into WINRE.
Step 2. Select Uninstall Updates under the More Powerful Settings menu.
Step 3. enter the password for an account with administrator rights, and then click Continue.
Step4. First, select the option to “Uninstall latest Quality update,” and then follow the on-screen instructions to complete the uninstallation.
Solution 5: Fresh Windows 10 Installation and Hardware Testing.
Your last resort, after trying the aforementioned solutions without success, is to create a backup of your data and reinstall Windows 10.
Okay, That’s all there is to it. What did you Find to be Effective?
Please share your thoughts on whether or not this information was helpful. If you found this information helpful, please like and share it.
Read Also:


