Encountering application errors on Windows can disrupt your workflow and be a source of significant frustration. One such common error is the Application Error ‘0xc0000142’, which can occur when launching various applications.
This detailed article aims to shed light on the meaning behind this error, its possible causes, and effective methods to resolve it.
Understanding Application Error 0xc0000142
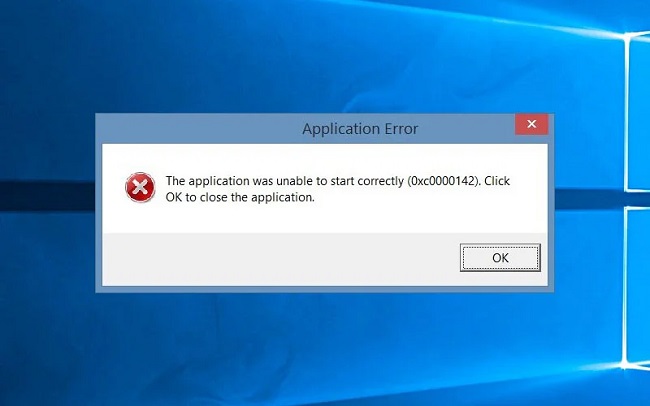
The Application Error 0xc0000142, typically displayed as “The application was unable to start correctly (0xc0000142). Click OK to close the application,” is a Windows error that occurs when an application fails to initialize properly. It can affect a variety of applications, from smaller tools to larger games or software suites.
Nature of the Error 0xc0000142
This error signifies that something went wrong during the application’s start-up process. It’s not specific to any one type of application or system configuration, making it a relatively common and yet complex issue to troubleshoot.
Read Also:
The Application Was Unable To Start Correctly (0xc0000142)
The most common causal reason for this error is .dll load error which means that you are lacking the .dll which is essential for launching the game or some other programs as well. That’s the issue gets arises due to .dll file. You can fix this issue by replacing this .dll file with a properly corrected .dll file.
Troubleshoot for this error:
Sometimes, this error may give rise due to the conflicting software. But it’s a little bit tricky to find out the software which is causing the issue although you can try to disable the Antivirus.
Sometimes NVIDIA drivers are also found to give rise to the issue. That’s why you can try to disable or uninstall the utility of GeForce or the utility of any other driver for sometimes which you are having.
Common Causes of the Application Error 0xc0000142
Understanding the root causes of this error is crucial for effective troubleshooting. Some common causes include:
1. Corrupted or Missing System Files
The error often arises when system files that are crucial for running applications become corrupted or are missing.
2. Incompatibility Issues
Running applications that are not fully compatible with the current version of Windows can lead to this error.
3. Faulty Software Installation
Improper or incomplete installation of software can result in missing files or configurations, causing the error.
4. Malware Infection
Malware infections can modify or damage system files, leading to various errors, including 0xc0000142.
5. Outdated Drivers and Software
Using outdated drivers, especially graphics drivers, or outdated versions of the software can result in compatibility issues and errors.
How to Fix Application Error 0xc0000142?
Here are the solutions –
Method 1: Clean Boot
The first solution for this error which you must try is performing a clean boot. By performing it, your startup programs and non-window services will get disabled which can be re-enabled when needed.
You will also experience a better performance by disabling unnecessary programs. You can repeat the same steps to re-enable them.
You also have to disable “Intel PROSet/Wireless Zero Configuration service” and have a look if it solved the issue. Also you must try to disable the “Program” and it may also give rise to issue.
For cleaning Boot on Windows Vista / 7 Computer
Step 1: Press Windows + R key to open the “Run Dialog”.
Step 2: Put command msconfig in Run Dialog and select tab service then mark a tick on Hide all Microsoft Services then select Disable all.
Step 3: Now select tab Start Up then select Disable All then select Apply.
Step 4: Restart your device.
For cleaning Boot on Windows 10 Computer
Step 1: Press Windows + R key to open the “Run Dialog”.
Step 2: Put command msconfig in Run Dialog and click OK.
Step 3: System configuration windows will get loaded by doing so. Select service tab and mark a tick on Hide all Microsoft Services then click Disable all.
Step 4: Select Apply then OK. Choose Restart later when prompted to restart.
Step 5: Press Windows + R key to open the “Run Dialog” again. Put command msconfig and click OK.
Step 6: System configuration box will open by doing so from which select Start Up then click Open Task Manager.
Step 7: Look for the last field named Start-Up Impact then disable each one having High Impact by right-clicking on it then click Disable.
Step 8: Now they will get disabled from getting started automatically whenever your device gets a reboot.
Step 9: You can normally start them and re-enable them when needed by going through the same steps by clicking on Enable instead of Disable.
Reboot your device after that and cleaning Boot will get started.
Method 2: Running in Compatibility Mode
You must try to run your application in Compatibility mode as it may fix the error.
That’s before trying the tricky and complicated methods, you must try this method. If it is unable to fix the issue then you must move to try further methods.
Follow the steps given below to do so:
Step 1: First of all look for the application icon and right-click on it.
Step 2: Now click on the option “Properties” and select the “Compatibility tab”.
Step 3: Select the option “Run compatibility troubleshooter”.
Step 4: Now click on the option “Try recommended settings” when it asked.
Step 5: Select the option “Test program”. Your programs will be tried to run by Windows in the recommended settings.
Step 6: Now you have to close the program when it runs successfully. But don’t do anything if the Program doesn’t run.
Step 7: Select the option “Next” when the application gets closed.
Step 8: If the Program is running successfully then you have to select the option “Yes” and save the new settings for the program. If the programs are not running then select option “Cancel”.
Step 9: Now select option “Run this program in compatibility mode for:”
Step 10: Now a list will appear from which you have to click on “Windows 7” which is present below the option “Run this program in compatibility mode for:”
Step 11: Now select “Run this program as an administrator”.
Step 12: Finally select the option “Apply” and then “Ok”.
Run the application and have a look if it now working or not.
Method 3: Manually Downloading the Files
As the causal reason of the issue is unsigned DLL files then you must try to replace the old one with a new file and this method will probably fix the issue.
Follow the steps mentioned below to do so:
Step 1: First of all you have to visit the link and from there download all the three files.
Step 2: Move to the folder where downloaded files are located which is most commonly the “Downloads” folder.
Step 3: Now right-click the file and select “copy” in order to copy the files.
Step 4: Now move to the folder where the installed application which is displaying the issue is located.
Step 5: You have to right-click on that folder then select “paste”.
Step 6: Click on “replace the files” when it asks.
Step 7: Perform the same process for all three files which you have downloaded in the first step.
Then run your application and have a look if the issue has resolved now.
Method 4: Using Regedit.exe
As the corrupted or unsigned DLL file can be the reason for this error then you use Reget.exe to get rid of this error.
LoadAppinig_dlls is a process that launches the .dll in the reg-key at the time when your programs gets starting. You can try to change its value to 0 as it can fix the error.
Follow the steps that are mentioned below to do so:
Step 1: First of all you have to hold the Windows icon key then press R key.
Step 2: Now put command regedit.exe and hit the Enter key.
Step 3: Now move to the given path:
HKEY_LOCAL_MACHINE\SOFTWARE\Microsoft\Windows NT\CurrentVersion\Windows
In case, you don’t know how to move to the path the go through the steps mentioned below:
Step 1: First of all from the left pane double click on option HKEY_LOCAL_MACHINE
Step 2: From the same left pane, double click on “Software” then on “Microsoft”.
Step 3: Now double click on the option “Windows NT” and “Current version”.Now click the option “Windows”.
Step 4: Now from the right panel you have to double click on the option “LoadAppInit_Dll”.
Step 5: Select the value 0 and then click on “Ok”. Finally, restart your device once to make the newly made settings effective.
Step 6: Start the program and have a look if the issue has resolved now or not.
Method 5: Changing System Locale
It is essential to select the correct region on your Windows as there are some of the applications which check the region.
If they found it incorrect then the application may not get started correctly. That’s why we will change the region settings in this solution.
Follow the steps mentioned below to do so
Step 1: First of all you have press the combination of key “Windows” + “S” key then type “Control Panel”.
Step 2: Click onthe program which appears at the top of the list.
Step 3: Now select the option “View” and then “Small Icons”.
Step 4: Now select the option “Regions” then click on the tab “Administrative Tab”.
Step 5: Now select the option “Change System Locale” then select the dropdown “Current System Locale”.
Step 6: Now select the option “Change System Locale”.
Step 7: A list will appear to you from which you have to select your region then click “Ok”.
Open your application and have a look of you have solved the issue.
Method 6: Changing Command Prompt Configurations
In some cases when the settings of any Command Prompt is not properly configured the this may give rise to the issue. That’s why in this solution, you have to change the settings of some configurations.
Follow the steps mentioned below to do so:
Step 1: First of all you have to press the combination of keys “Windows” key + “R” key in order to launch the Command Prompt.
Step 2: Now put the command cmd and hit the Enter key.
Step 3: Now put the below mentioned command and again hit the Enter key.
for %i in (%windir%\system32\*.ocx) do regsvr32.exe /s %i
Step 4: Keep patience and let the process to get completed. Restart your device once after the process gets completed in order to make the newly made settings effective.
Have a look of the issue has solved successfully.
Method 7: Reinstalling Application in Safe Mode
In case you are having any trouble running any of the applications on your device then restarting device or booting it into a safe mode is a prior recommendation as we have mentioned above in the second method of this article.
First of all you will have to boot your device in a clean boot state and when it is booted you have to reinstall that specific application in which you are facing the trouble.
exit safe mode when your application is successfully installed. Now have a look if your issue has been resolved by doing so.
In case, you are using Office program or Outlook then you must click to run program and change the update channel of it into semi-annual or annual.
Performing this method can make you to the issue if you was facing it on your Office application.
Method 8: Modifying Application
Some of the times in certain cases, it may possible that the application may not properly configured while installing and that’s why it may not provided with authoritative permissions.
So, in this solution you have to modify the installation of the application. Go through the below mentioned steps specially when you are having an error in Microsoft Office Program.
Follow the steps mentioned below to do so:
Step 1: First of all you have to press the combination of keys “Windows” + “I” in order to launch the settings.
Step 2: Now, from the settings, select the option “Apps” then click on “Apps & Features” which is present on the left pane.
Step 3: Go down in the list of installed applications and select the option “Microsoft Office”.
Step 4: Click on the option “Modify” then allow the prompt of displayed on your screen.
Wait for a few minutes and check if you have successfully solved the issue.
Method 9: Using Task Manager
Most of the time some users face this error in their Microsoft Office applications and in order to fix this issue you will have to close every application which are related with Microsoft office.
Follow the steps mentioned below to do so:
Step 1: First of all you have to press the combination of keys “Windows” key + “R” key in order to launch the Run Prompt.
Step 2: Now put the command taskmgr to launch Task Manager and hit the Enter key.
Step 3: Now select the “Process” tab.
Step 4: Now in the process tab, go down and find any app related to Microsoft Office which is running in the background.
Step 5: You have to click on that app and then end it completely by clicking on “End Task”.
Have a look if your issue has resolved now. If still not then you must try to end all the useless apps which are running in backgrounds such as Outlook
Skype or any other third-party app related to Microsoft Office running in the background.
Method 10: Installing Update
Sometimes the error give rise due to the missing files of Windows update in your device.
That’s why in this solution you have to check and install the updates by using built-in Windows tool.
Follow these steps to do so:
Step 1: Open the settings by pressing the combination of keys Windows and I key.
Step 2: From the settings, select the option “Update & Security” then click option “Windows Update” present on left pane.
Step 3: Now click on the button “Check for Update” and wait until your updates are downloaded and installed.
Have a look if the issue is resolved now.
Note: In case, you are still persisting the issue then you must create a new account and it will surely fix the error.
Read Also:
Conclusion
A list of best and effective solutions are given in this article to help you to fix the Application Error 0xc0000142. We have explained all the solutions with step by step proper guide which will surely help you to fix the error. Hope this article will be helpful for you.


